Skip to content

2019

Cleaning Airflow Logs

At home and work I make use of Airflow to automate various batch/time based task. I’ve even setup a container based Airflow environment to make it easy to bring this up and down.

One of the things you quickly find with Airflow is that while it doesn’t need a lot of resources to run, it can quickly eat up whatever disk space you provide it with logs. When this happens the first knobs to look at turning are your log level and your schedulers dag bag refresh rate. While you may not be refreshing dags often your may want to keep your log level low to capture more data and use your log store to put a TTL on things at the INFO level. Unfortunately you can't completely turn off Airflows disk logging without building in some custom functionality today. To help manage this I wrote a small Python script that handles cleaning up the local logs on a given interval. Note if you're running Airflow in a setup other than LocalExecutor you will want to handle this with something like Cron instead of a dag since you need to clean logs up on the Scheduler, Worker and Webserver.

def truncateprocessmanagerlog(logbasepath):  
 """  
 The scheduler records all acitivty related to dag processing in the same file.  
 This file can grow large fast, and is actively in use. Intead of unlinking the  
 file and pulling it out from under the scheduler truncate.  
 """  
 dagprocessmanagerlog = os.path.join(  
 logbasepath, "dagprocessormanager", "dagprocessormanager.log"  
 )  
 open(dagprocessmanagerlog, "w").close()  

def traverseandunlink(fobject):  
 """  
 Traverse the log directory on the given airflow instance (webserver, scheduler,  
 worker, etc) and remove any logs not modified in the last hour.  
 """  
 for entry in os.scandir(fobject):  
  newfobject = os.path.join(fobject, entry)  
  if os.path.isfile(newfobject):  
   lastmodified = os.stat(newfobject).stmtime  
   delta = datetime.utcnow().timestamp() - lastmodified  
  if delta > HOURSINMILLISECONDS:  
   print(  
    f"{newfobject} has not been used in the last hour. \  
   \nCleaning up."  
   )  
   os.unlink(newfobject)  
  elif os.path.isdir(newfobject):  
   traverseandunlink(newfobject)

The full script is available here.
Review EdX UT601 Embedded Systems

I recently completed my first EdX course Embedded Systems Shape the World and wanted to share a little bit about the experience.

For a while now I’ve been exploring various venues for continuing education. The longer I’m in my field the more I learn and then that leads to me realizing how much more I want to learn in new areas. That said I’ve never been great at taking courses that are not self paced partially because week to week my schedule can change dramatically between work and family. Because of this over time I’ve tried out multiple platforms of learning such as Pluralsight, Khan Academy, formal online masters programs etc. All of them have their pros and cons ranging of cost to quality to engaging content.

Last year I started learning more about SoC type hardware via Circuit Playground. This has lead me on an adventure to learn more and more about embedded systems, C and hardware. Most of this has been stitched together from various sources and ad hoc as the need arose in a personal project. Towards the end of summer I decided I wanted to formalize this learning and started to look around. There are online programs from universities like TESU, and individuals offering classes, but I stumbled across the UT 601 class on EdX and realized the setup would be a good fit for me. Additionally EdX offers verified courses with certificates which I thought might be nice in the future.

Signing up and getting verified with EdX was easy. I was able to use my laptop and phone to complete all the task in under 30 minutes. The layout of EdX is very similar to other online learning platforms that I’ve used.

UT 601

Once I started UT 601 I started to run into a few more barriers. The course requires the purchase of a Texas Instruments kit for use throughout, which makes sense this is an embedded systems course. What I wasn’t expecting was the use of Keil. To complete the course I needed to be able to install Keil 4.2, and a simulator DLL (which was pretty neat) on a Windows platform. A couple annoyances there. This is an online course with the goal of global education opportunities, but immediately I'm locked into a platform, and additionally Arm places Keil behind a personal information collection form. I was happy that Microsoft provides a Windows 10 ISO that I could use within a VM to work on the course. After downloading that though I found that VirtualBox didn't pass through the board USB connection so that I could make use of the Stellaris Debugging software/firmware that I would need. After some time fiddling with it I ended up switching to VMWare, and after switching the USB connection to pass through as 2.0 was able to get everything packaged up into a Windows VM with Keil, the Stellaris software, the simulator DLL and the appropriate Keil registry edits. In case it would ever help anybody my VMWare config file is here.

After spending a couple days getting the IDE, hardware and VM all setup and playing well together I dove into the course. Overall I enjoyed it. It exposed me to PIN programming and doing a lot of GPIO work that I haven’t done in the past. Additionally it was a good refresh on concepts at the beginning like pipelining. One thing I did notice is there was a big jump from lab 5 to 6. We went from editing template projects to writing most of the project from the ground. Each section provded a different amount of direction (not gradually declining, but instead seemingly random) on how to complete the lab. New concepts were quickly introduced and some lacking explination such as using the Keil Oscilliscope and Analyzer. Overall it was a good course, but I would suggest dedicating a couple weeks and doing it all at once due to how much it ramps up half way through. The accompanying book is made available in each section and I highly recommend reading it as the videos act more as highlights than covering the material at a level that prepares you for the labs.

The one thing that was a minor annoyance throughout was the reliance on Keil (IDE’s have a place but often hide what the compiler and tools are doing creating a gap in knowing how stuff works) and the problems experienced by taking this course in a VM. Other than that the course was interesting and challenging.

Wrapping up

Overall I’m glad I took and completed UT601. I learned a fair amount, and look forward to taking part 2 after the the new year. EdX is a platform I see myself continuing to use as it’s been super simple, has a range of interesting content, and the course facilitators are really responsive.

EdgeRouter X DDNS with Gandi

I recently setup a VPN for my home network. To make use of it from remote networks I need to be able to resolve the public IP of my router. Instead of hard coding the IP I setup an domain with Gandi and created an A Record that I update from my router.

Fetching and reporting your IP

This part was fairly easy. With a quick search I found that somebody else had already solved the problem of reporting the public IP from an Ubiquiti router to Gandi! Checkout their work here. Their README provides a nice easy walk through of the setup.

Scheduling it

With the above script updated and working on my router the next thing to do was schedule it.

Quick note only specific directories persist between firmware updates on the EdgeRouter. Because of this I suggest putting the script above in config/scripts/ or config/user-data.The EdgeRouter OS provides a helper utility called task-scheduler which wraps cron. The benefit of task-schedule is that is saves our commands to config so they persist through upgrades. ssh into your router:

ssh <user>@<router>  
configure  
set system task-scheduler task ddnsupdate  
set system task-scheduler task ddnsupdate crontab-spec '0 5 * * 0'  
set system task-scheduler task ddnsupdate executable path '/config/user-data/'  
commit  
save  
cat /etc/cron.d/vyatta-crontab

EdgeRouter X Home VPN Setup Pt 1

Recently I got the itch to setup a VPN for my home network to access my device lab on the go, or share with others. My home setup isn’t too complicated, but it’s a bit different from other setups I found when I started down this path.

Network Components: Arris Surfboard SB6141, Ubiquiti EdgeRouter X, Ubiquiti AmplifiHD

I am not a network or sysadmin by day. This is something I’m actively learning on and figuring out. If you see something wrong or have suggestions I would love to hear about it. Reach out.

Preparing the network

As my starting point I had used the EdgeRouter wizard for initial setup way back when. The default places the network in the 192.168.1.0/24 range which should be changed to prevent a conflict for devices on remote networks. To add a new dhcp server handing out address in a new range we will use the ubiquiti ui.

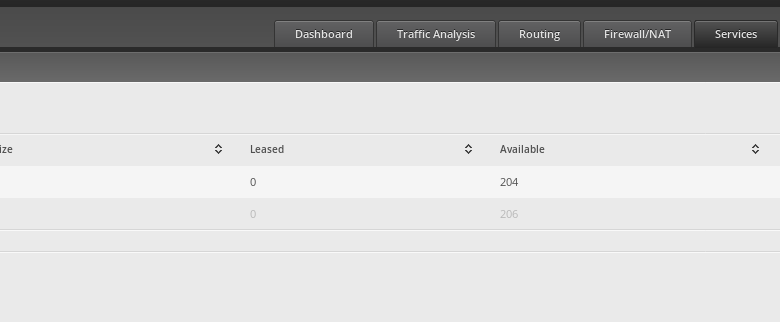
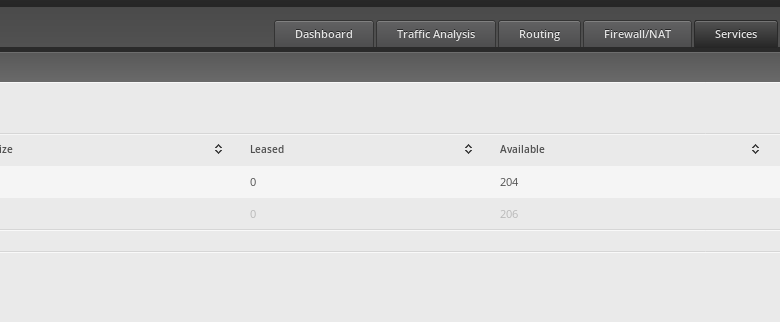
To start login to the ubiquiti ui and navigate to the Services tab.

From here you can see + Add DHCP Server on the left side of the screen.

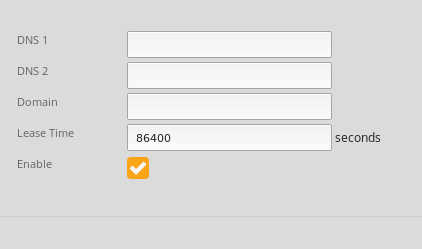
Select Add and configure a new DHCP server leasing addresses in a new range ( 192.168..0).

With this setup the next thing to do is test it works before removing the old DHCP server settings.

Return to your Dashboard, and locate the switch0 interface. To the far right you should see an actions button.

Click, select config, and add a manually configured IP for the dhcp server you just configured (192.168.x.1). With switch0 talking to our new network range return to the Services tab. Click actions on the original DHCP server, select disable, and then logout.

Now you can log back in on the new network range 192.168.x.1. Login, select switch0 from the Dashboardtab as we did earlier, and remove the original DHCP server. For any devices on your network that were active you will need to do a dhclient -r; dhclient to refresh your device (on *nix) ip and lease in the new range.

Next Steps

With the network configured we are now ready to install and setup wireguard Since this has already ran a bit long in the tooth part 2 can be found here.

EdgeRouter X Home VPN Setup Pt 2

I am not a network or sysadmin by day. This is something I’m actively learning on and figuring out. If you see something wrong or have suggestions I would love to hear about it.

In part one we configured the network. Now we are ready to install Wireguard and create our interface. Before I jumped into doing this I referenced these post and docs.

To get started ssh into the EdgeRouter device.

ssh <user>@<edgerouterip>Once logged in we need to pull, install the Wireguard .deb.

cd /tmp*# Download the appropriate version, pay special attention here, if you are using the Ubiquity v2 firmware  
# you will need the wireguard-v2-*  
*curl -qLs https://github.com/Lochnair/vyatta-wireguard/releases/download/0.0.20190913-1/wireguard-v2.0-e50-0.0.20190913-1.debsudo dpkg -i wireguard.debAn important note from the source repo

Note that since Wireguard is not software bundled with the EdgeOS firmware, firmware upgrades necessitate re-installing the Wireguard debian package. Once the wireguard package is re-installed re-applying the existing Vyatta config file, or rebooting will restore your interfaces.

First things first we need to generate a private key for the router, and a public key to share with clients.

$ wg genkey | tee /dev/tty | wg pubkey  
123ddgqeqe123123

This will output two lines. The first is your private key, the second is your public key. Keep these secure, but ready since you will need to provide the public key to all clients.

With our keys generated we can now configure the Wireguard interface. Ours will be wg0. In the terminal:

configureset interfaces wireguard wg0 address 192.168.55.1/24  
set interfaces wireguard wg0 listen-port 51820  
set interfaces wireguard wg0 route-allowed-ips true  
set interfaces wireguard wg0 private-key <private-key-from above-output>commit  
saveThis created a new wireguard network on 192.168.55.1/24; listening to port 51820 and will route all the traffic through wg0.

Now keeping our public key ready we can configure a client.

Configuring Wireguard on Ubuntu

If you’re using Ubuntu 19.10 wireguard should be available from apt by default:

sudo apt-get update  
sudo apt-get install wireguardWith prior versions:

sudo add-apt-repository ppa:wireguard/wireguard  
sudo apt-get update  
sudo apt-get install wireguardOnce again we need to generate our keys, now on the client:

wg genkey | tee /dev/tty | wg pubkeyNow, create the wireguard interface, still on the client.

touch /etc/wireguard/wg0.conf  
chown root:root /etc/wireguard/wg0.conf  
chmod 600 /etc/wireguard/wg0.confsudo vim /etc/wireguard/wg0.conf<--------wg0.conf-------->  
[Interface]  
Address = 192.168.55.5/32  
PrivateKey = <client-private-key>[Peer]  
PublicKey = <router-public-key>  
AllowedIPs = 192.168.55.0/24  
Endpoint = publicipofrouter:51820

Peering the router and client

With the client configured and keeping the public key it generated, return to the router. ssh and run:

set interfaces wireguard wg0 peer allowed-ips 192.168.55.5/32 commit save

Starting your client VPN

With wg0 configured and ready bring up the VPN on our client.

sudo wg-quick up wg0

And verify connectivity by running sudo wg on the client, and router.

Next Steps

With VPN setup I’m now able to access and provide access to my device lab. This also keeps devices using this router that are not part of the lab separated.

Finally if you’re doing this for the first time some next steps you might want to take include:

  • Switch devices to only allowing ssh via keys.
  • Switch to a non default ssh port.
  • Setup fail2ban.
  • Pickup from here

EdgeRouter X PiHole Setup

I’ve seen a few post from people asking for help adding a PiHole to their network with an EdgeRouter. One solution I’ve seen is to use brittanics black-list. This is nice for those wanting to run software on their router, but I didn’t want the load, and I want the functionality that the PiHole provides. Hopefully this guide help those looking to add a PiHole in the future.

Setting up the PiHole

I’m going to assume you’ve already installed PiHole on your device. If not the docs are a great place to start. If you set this up on a Raspberry Pi I encourage you to disable autologin, add a new user, add the user to the sudo group and enable ssh. For more information checkout the RaspberryPi docs.

Configuring EdgeRouter to use the PiHole

I’m assuming your edgerouter is the DHCP server on your network.

With PiHole installed, connect the device to your network (preferably wired) and login to the Ubiquity web ui. Click on the Services tab.

On this tab you should see an action button on the right side of the screen across from your DHCP information. Click it, and select configure. In the pop up window select Leases, and you should see the device your PiHole is on. Click the Static MAC/IP Mapping tab and give this device a static IP.

While we are here click the details tab and add the IP as DNS 1.

Return to the main web ui Dashboard. At the bottom of the screen you should see a system tab with an arrow on the far right.

Click it and on the right side of the pop up add the IP you just assigned the PiHole as your Name Server.

With this in place login to your PiHole, navigate to network and you should see your router listed. The device should be highlighted green with a query count indicating that traffic is flowing through the PiHole as expected.

Hackaday Connected World Follow Up

Recently Hackaday announced the results of the Connected World contest. It made my day when I read Sophi’s email telling me that ConnectedRoomba was one of the OSHPark certificate recipients. What may have seemed like a small announcement meant a lot to me. I’m still fairly new to this area of computing, and without formal training. Instead I spend a lot of time reading, listening and building to learn everything I can. Validation and success no matter how big or small help us all stay motivated to continue in our pursuits. Thank you to everybody at Hackaday for setting up a community and contest for us all to continue learning, sharing and hacking together.

Whats next

Everybody starts somewhere and the contest pushed me to get started on my first homebrew project. As part of this I found a lot of new areas to study up on. I’ve enrolled in the edX Embedded Systems course. If you’re taking that too reach out as I’d love to have a group to work with. Additionally I want to migrate the ngrok setup in my project to a route on my own domain, understand secure LoRa transmission and expand my electronics knowledge.

On the board front I found this interesting Feather PCB from @tannewt while debating what to do with the OSHPark certificate. I recently backed the FOMU and learned of FuPy so this seems like an interesting PCB to pick up, order some components and start learning electronics at a whole new level.

Congrats to everybody that participated in the Connected World contest. Have fun hacking on whatever comes next! Thank you Hackaday, DigiKey and OSHPark for kick starting this new learning path :).

Contact

If you want to chat feel free to follow up via email or on Sourcehut.

Postgres Advisory Locks with Asyncio

Recently, here on the Cloud team at Elastic we started working on building a new service in Python 3.7. This service fetches data from a Postgres database, transforms it, and then submits that data to another service. Like many cloud-based services, ours runs in an orchestrated container environment where N instances can be running at any time. Often that’s a good thing, but our service has a few critical sections where only one instance should be able to process data. Since we are retrieving data from Postgres, we decided to go ahead and make use of advisory locks to control these critical sections. In this article I want to explain what advisory locks are, provide an implementation, and test to verify functionality.

Advisory locks

Postgres provides the ability to create locks that only have meaning within the context of your application. These are advisory locks. You use advisory locks to control an application’s ability to process data. Anytime your application is about to enter a critical path, you attempt to acquire the lock. When you acquire the lock, you can safely continue processing.

async with AdvisoryLock("goldleader", dbconfig) as connection:If it fails, then your application may retry, wait, or exit. Since this lock is external to the application, this allows for multiple instances of the application to run while providing safe critical path concurrency.

Building the lock

As part of our work, we wanted to make using advisory locks easy. To do this, we created the PostgresAdvisoryLock context manager. Since this is meant to be used with asyncio and asyncpg, we control the acquisition and release of the lock via aenter and aexit.

class AdvisoryLock:  
 async def aenter(self) -> asyncpg.connection.Connection:  
 self.lockedconnection = await asyncpg.connect(...)  
 await self.setlock()  
 if self.gotlock:  
 return self.lockedconnection  
 else:  
 if self.lockedconnection:  
 await self.lockedconnection.close()  
 raise AdvisoryLockException async def aexit(self, exctype, excval, exctb):  
 await self.release()Now this can be called like any other async context manager.

async with AdvisoryLock(config, "appname") as connection:  
 val = await connection.fetchrow("SELECT 1")

Testing the lock

Now that the PostgresAdvisoryLock class is implemented, we need to test it. To start we verify the base functionality by acquiring the lock, running a query, and validating we can't get the lock inside the same scope. I recommend using the asynctest library to help work with asyncio inside unittest.

async def testgetresultswithlock(self):  
 async with AdvisoryLock("goldleader", dbconfig) as connection:  
 val = await connection.fetchrow("SELECT 1;")  
 self.assertEqual(val[0], 1) async def testlockpreventssecondlock(self):  
 with self.assertRaises(AdvisoryLockException):  
 async with AdvisoryLock("goldleader", dbconfig) as connection:  
 await connection.fetchrow("SELECT 1;")  
 async with AdvisoryLock("goldleader", dbconfig) as secondconnection:  
 await secondconnection.fetchrow("SELECT 1;")

Since we are going to use this to control the execution of code across many processes, we also need to verify external process behavior. To do this we use the asyncio subprocess.createsubprocessexec function to create a new process. This process attempts to get the lock our main process already has, and it should fail.

async def testadvisorylockpreventsaccessfromseparateprocess(self):  
 with self.assertRaises(AdvisoryLockException):  
 async with AdvisoryLock("goldleader", dbconfig) as connection:  
 proc = await asyncio.subprocess.createsubprocessexec(  
 sys.executable,  
 "-c",  
 executable,  
 stderr=asyncio.subprocess.PIPE,  
 )

Wrapping up

When we started to build our new application, we knew we would be waiting on the network and database. Since we also had work that could happen during the wait, we decided to use asyncio. Additionally we identified a critical path where we used Postgres to achieve concurrency control. To make critical path control easier we created a module and a series of tests. Once finished we realized this might be helpful to others looking for the same control, or as a reference for those learning to test with asyncio.

You can find the full implementation and Docker setup on Sourcehut.

Connected Roomba - Wrapping Up

With everything working I wanted to make sure I didn’t have to reset everything anytime an odd decode error occurs, something loses and regains power, etc. For the Feather attached to the Roomba handling this is pretty straight forward. Everything is already running in a super loop, so all I need to add is a try/exceptblock to the while loop and discard errors. Doing the same thing for the Pi was again straight forward, but since it is running Linux I needed to make sure the applications handled failures, and that the scripts restart if the board restarts, the OS bounces, etc.

Similar to the Feather code I wrapped everything in a while loop, added exception handlers, but I also added logging so that I could understand if errors are created by the OS, the code or something else:

import logging  

LOGFORMAT = "%(asctime)s:%(levelname)s:%(message)s"  

logging.basicConfig(  
 filename="/home/pi/logs/button.log",  
 level=logging.INFO,  
 format=LOGFORMAT,  
 datefmt="%m/%d/%Y %I:%M:%S %p",  
)  

logger = logging.getLogger(name)...if name == "main":  
while True:  
 try:  
 ...  
 except BaseException as e:  
  logger.exception(e)  
 pass

And since this is running on Linux setting up cron to handle starting the applications after reboot was one command away.

sudo crontab -e@reboot cd /home/pi/ && /home/pi/.virtualenvs/lora-pi/bin/python /home/pi/projects/roombasupervisor/buttonlistener.py 2>&1 >> /home/pi/logs/button.log  
@reboot cd /home/pi/ && /home/pi/.virtualenvs/lora-pi/bin/python /home/pi/projects/roombasupervisor/smslistener.py 2>&1 >> /home/pi/logs/sms.log  
@reboot sleep 10 && cd /home/pi/ && /home/pi/ngrok http 5000 2>&1 >> /home/pi/logs/ngrok.log  
@reboot sleep 20 && curl http://127.0.0.1:4040/api/tunnels 2>&1 > /home/pi/logs/ngrokdetails.log

Wrapping Up

Since this was my first project interacting with an embedded system I learned quite a bit along the way. Abstractions are something that are useful, but can add bloat and load that won’t work in constrained environments. I wasn’t able to use the Roomba library I built with the Circuit Playground on the Feather that I connected to the Roomba. CircuitPython made learning and prototyping easy with a REPL and constant connection to the Open Interface. It also allowed me to focus on learning more about the boards and data interactions since I wasn’t busy rebuilding my software toolchain for a new environment. That said it has also inspired me to learn more and dig deeper into the embedded world since there are a lot of things I can’t user (interupts). There is a lot that I don’t know or understand yet, but with the help of some books and boards I am sure I will be busy expanding my understanding for the next few years.

Contact

I really enjoyed working on this project. If you want to reach out feel free to follow up via email or on .

Connected Roomba - SMS

As I mentioned before one of the primary reasons for starting this project was to let my wife and I start the Roomba when we are not at home. One device that most of us take everywhere is our phone. An easy way to to send information from your phone without a custom app, stack and hassle is SMS. While it’s easy to broadcast receiving that message can take a little work.

Twilio

Luckily monitoring a number for messages is pretty much a solved problem. Twilio offers an easy way to setup number with an attached webhook for receiving and sending messages. They also have a nice Python tutorialthat had me up and running in about 10 minutes. Since I was already using the Pi Zero to send commands to the Roomba setting up a script to watch for an SMS message and pass on the new command was simple enough.

import busio  
import board  
import adafruitrfm9x  
from digitalio import DigitalInOut  
from flask import Flask, request  
from twilio.twiml.messagingresponse import MessagingResponseCS = DigitalInOut(board.CE1)  

RESET = DigitalInOut(board.D25)  
spi = busio.SPI(board.SCK, MOSI=board.MOSI, MISO=board.MISO)  
rfm9x = adafruitrfm9x.RFM9x(spi, CS, RESET, 433.0)  
rfm9x.txpower = 23app = Flask(name)  

@app.route("/sms", methods=["GET", "POST"])  
def smsstartroomba():  
  """  
  When a message is received determine which  
  signal to send the Roomba and reply  
  to the sender.  
  """** *txt = request.values.get("Body").lower() if txt == "start":  
  msg = "Starting the Roomba."  
  cmd = bytes("1", "ascii")  
  elif txt == "halt":  
  msg = "Stopping the Roomba."  
  cmd = bytes("0", "ascii")  
  elif txt == "dock":  
  msg = "Roomba beginning to dock."  
  cmd = bytes("2", "ascii")  
  else:  
  msg = "Unknown command. Continuing."  
  cmd = None if cmd:  
  rfm9x.send(cmd) resp = MessagingResponse()  
  resp.message(msg) return str(resp)  

if name == "main":  
 app.run(debug=False)

And with that the same board I had used to test sending messages in response to button clicks can now receive SMS payloads and translate that into a command that the Feather will use to start, stop or dock the Roomba.

Next Steps

With all the pieces assembled and working the last thing to do for version 1 was setup some redundancy, restart everything and make sure it all worked as expected without my intervention.