Skip to content

Index

Connected Roomba Remote - LoRa

With a basic setup working the next thing I wanted to do was make communication wireless. Thinking about my options I ruled out using WiFi pretty quick since I didn’t want to worry about discovery and router issues. I thought about Bluetooth since I could send commands from my phone to the board on the Roomba, but decided against it due to my lack of mobile programming experience and not wanting to add yet another new thing to learn. (Side note I’ve since learned about the Bluefruit app) Looking at the other Feather options I decided to make use of LoRa for my communication layer since it would be easy to use, my packets are tiny and I didn’t have to worry about software beyond CircuitPython.

The boards

With the protocol determined and sticking with CircuitPython I found a Feather with LoRa built in, and a Pi Zero Bonnet with some buttons and a small display that would make testing easier. After reading through thedocs and tutorials for both boards I began work on signalling the Roomba to start with the push of a button.

One of the first road blocks I ran into was of my own creation. The Roomba library I wrote for prototyping was too big for the Feather. The good news was OpenInterface was still useful, and there was plenty of room for the base class after removing the debug and abstraction code, so I only compiled the commands I knew I was going to use for version 1 and continued moving forward.

class OpenInterface:  
 def init(self, txpin, rxpin, brcpin, baudrate=115200):  
 self.board = busio.UART(txpin, rxpin, baudrate=baudrate)  
 self.txpin = txpin  
 self.rxpin = rxpin  
 self.brcpin = brcpin  
 self.brcpin.direction = digitalio.Direction.OUTPUT  
 self.baudrate = baudrate  
 self.stopped = True def start(self):  
 if self.stopped:  
 self.wakeup() for command in (b"\x80", b"\x83", b"\x87"):  
 self.board.write(command) def stop(self):  
 for command in (b"\x85", b"\xAD"):  
 self.board.write(command)  
 self.stopped = True def wakeup(self):  
 for i in range(3):  
 self.brcpin.value = False  
 time.sleep(0.5)  
 self.brcpin.value = True  
 time.sleep(0.5)  
 self.brcpin.value = False  
 time.sleep(0.5) self.stopped = False

After stripping things down and getting the Feather to start and stop the Roomba from the REPL I turned my attention to the Pi.

With the Pi Zero providing more resources installing the OS, setting up SSH and compiling Python 3.7 took more time then getting the Circuit Python libraries working. Blinka worked like a charm and following the docs from above I had a quick script to send start and stop packets via LoRa working in no time.

while True:  
 try:  
 if not startbutton.value:  
 msg = "Starting Roomba."  
 logger.info(msg)  
 rfm9x.send(bytes("1", "ascii"))  
 display.fill(0)  
 display.text(msg, 25, 15, 1)  
 elif not stopbutton.value:  
 msg = "Stopping Roomba."  
 logger.info(msg)  
 rfm9x.send(bytes("0", "ascii"))  
 display.fill(0)  
 display.text(msg, 25, 15, 1)

The display on the bonnet was a nice touch so that I could watch the Feather in a terminal while the Pi let me know immediately which button was pressed and which command I should expect the Feather to receive.

Next Steps

With the boards talking to each other and the ability to start/stop the Roomba with the press of a button the last thing to do was make this work when we are not at home. While LoRa has a pretty good range I wanted this to work for my wife and I without having to worry about where we are. In part 3 I look at making this work with SMS.

Connected Roomba - Possibilities

A couple years ago at PyCon I received a kit from Adafruit containing the Circuit Playground Express. After going through the Hello World examples I boxed it up I didn’t have a project ready to go. Fast forward to the winter of 2018 when I decided I would like to be able to start our Roomba away from home because of the noise it makes, and suddenly I had the project I was looking for. Digging around I found out about the Roomba Open Interface and set out to start talking to my Roomba with CircuitPython.

Will this work

After reading through the Open Interface spec I decided it should be possible for me to control the Roomba by using the Circuit Playground Express that I had waiting on the shelf. Getting the kit out and using the clips available I connected the Playground Express TX to the Roomba RX, opened a REPL and tried to wake the Roomba, but received no response.

After some more searching I found out that certain series firmware will not respond to wake commands after 5 minutes without a signal. Knowing this, and pressing the power button once to wake the Roomba, I was able to START, STOP and DOCK the Roomba with controller code running on the Playground Express.

Next steps

After spending some more time confirming command structures, documentation and behavior between CircuitPython and the Roomba Open Interface I decided to make things easier by building a package to abstract the interactions. With basic wiring and command functionality confirmed I decided it was time to start looking at making remote signalling covered in part 2.

Creating a Con Badge with PyPortal

Recently I've heard about multiple people working on con badges and decided to try my hand at a simple take on the idea. Since I had just recently received my PyPortal Adabox I thought I would use that as my first platform to get started.

From the product page the PyPortal is:

An easy-to-use IoT device that allows you to create all the things for the “Internet of Things” in minutes. Make custom touch screen interface GUIs, all open-source, and Python-powered using tinyJSON / APIs to get news, stock, weather, cat photos, and more – all over Wi-Fi with the latest technologies. Create little pocket universes of joy that connect to something good. Rotate it 90 degrees, it’s a web-connected conference badge #badgelife.Like many other CircuitPython powered devices the PyPortal has a great Explore and Learn page available that walks you through getting the right firmware installed as well as providing hardware breakdowns, code demos and FAQ.

Once I had the PyPortal up to date and had gone through a couple demos I landed on having my first badge being a simple menu systems. While many badges will contain easter eggs or ways to interact with other badges I decided to keep it simple for this first run. I wanted my badge to be able to display a couple pieces of static data and have a couple interactive options.

I landed on a Button menu that would show a couple maps, a photo of my badge, a countdown to Gen Con, and a simple D20 roller.

Along the way I made extensive use of the docs and source code that Adafruit provides.

I also found it easy to find documentation for the module I would pull in from the library modules by referencing the list of submodules on Read the Docs

Curiosities

While building my badge I ran into some interesting edges that I hope to explore further. I'm sharing these here just in case somebody else reads this and can avoid similar pitfalls or suggest a different direction.

  • Large buttons seem to lead to performance and OOM errors
  • Originally my menu had 8 buttons (one with information about Adafruit, another with information about the project), but that wasn't stable. After 3 or 4 clicks gc or something else couldn't keep up with the memory allocation and the badge would crash with a MemoryError
  • My schedule was also a menu of buttons originally. This let me setup a list of tuples I could manipulate in code, but when I had 5 buttons span the screen render time was visibly slow, and lead to inconsistent OOM errors.
  • Different fonts have different performance characteristics
  • Looking back this makes sense. Different glyphs will have different structures. Depending on that a glyph can place different loads on the system. I tried a few of the "performance" font from GoogleFonts, but ultimately landed on Arial Bold for a font that looked consistent, rendered quickly and didn't have a large file size.
  • Better ways to sleep?
  • My badge spends a lot of time in the main super loop polling if a button has been pressed. At this time I don't think CircuitPython supports interrupts. I hope in the future i can figure out a better was to let the device sleep, but capture an interrupt type event such as the display being touched.
  • PDB for CircuitPython
  • I spent a lot of time running snippets in the REPL. This is a nice experience to have for an embedded device, but I do miss having PDB or WebPDB to drop a breakpoint in my code, let it run and then inspect the stack, heap etc from a given point in my program. I believe MicroPython contains this functionality so I'm guessing it's possible with CircuitPython I just haven't dug in to make it happen yet.

Lessons Learned

Similar to the interesting behaviors I found above I learned a bit about developing with CircuitPython and how it can differ from my day to day Python development along the way.

  • Python data structure sizes
  • Many code bases make liberal use of dictionaries. In fact some say that Python is built on top of the dict data structure. It's incredibly useful to look items up by key, and provides some human readability over indexing into a collection with no reference beyond position. That said Dictionaries are one of the largest builtin Python objects. One of the reasons for this is something called a load factor that I won't go into now, but suffice to say as you add more objects to a dictionary and it approaches a given load factor it will automatically grow in size. Because of this in a memory constrained environment I found myself removing dictionaries or list of dicts and using more tuples and list of tuples.
  • Take out the garbage
  • Python Garbage Collection is handled via reference counting. Because of this it's important to think about when an object (especially large objects ) you are using come in scope, and when they leave scope. In an environment like CircuitPython you may also want to call gc.collect() when you leave scopes with large objects to make sure they are garbage collected before you carry on. This can help avoid some OOM errors.
  • Careful wih that indirection.
  • I found myself removing helper functions and other pieces of code that helped keep things "clean". Often times I did this because I was hitting performance of OOM errors that would go away when I put the functionality in the parent scope. Because of this I have repeated code, and code that isn't what I would expect to pass code review day to day, but it works, achieved stability and gave the performance I'm looking for on my badge.
  • Testing and profiling for this environment is still a challenge for me.
  • I would love to be able to write a test for my function and then profile that test to capture things like stack depth, object sizes, timing, etc. And since I have a test I could do this N times to see what kind of behaviors emerge. Instead right now I manually make a change and validate. Because of this I think I'm building an intuition of what is happening, but I can't verify it which leads me to assume my understanding has gaps, and potentially wrong assumptions today. Making this better can help me address the point above.

Next Steps

So with v1 of the badge prepared and ready for Gen Con 2019 I'm going to step back and work on some other items in this space. While working on the project I found out that labels don't support an orientation flag. After mentioning this in discord I opened an issue on Github with some encouragement from @ladyada. Hopefully I can spend some cycles working on that.

I also continue to think about how to write tests for CircuitPython. Since the runtime is tied to the boards it's not as simple as running the code in a CPython unittest environment. While there is a lot of overlap in the API and behavior it's not a one to one match. I think being able to test the code would lead to faster development cycles and would open the door to better profiling and understanding of my applications behavior.

Finally I plan to back up and read Making Embdedded Systems by Elicia White and visit some other embedded getting started materials. While I had a lot of ideas for this project (and I'm happy with how it turned out) I realized that since I'm not as familiar with this type of hardware environment I struggled at times to get the functionality I was looking for with the performance I needed.

Acknowledgements

Thanks to the team at Adafruit. The devices they build and the creation of CircuitPython has lead me to pick up a hobby that continues to be fun and encourages me to think in new ways about hardware and the programs I'm writing. Additionally Adafruit has a discord where many people have been incredibly patient and helpful as I learn and ask questions.

Contact

I've really enjoyed working on this project. If you want to reach out feel free to follow up via email or on.

You can find out more about the badge and source code in the repo

More Photos

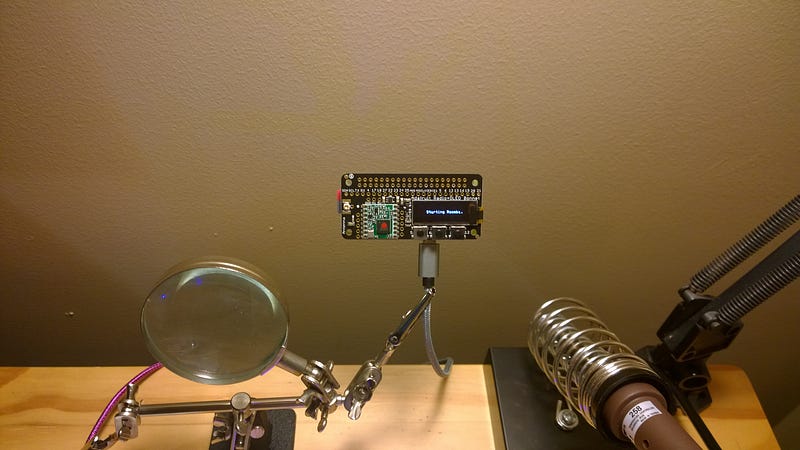
Some additional photos of the portal. I've ordered a case off thingiverse , but using the Adabox case while I wait.

Using Dataclasses for Configuration

Introduced in Python 3.7 dataclasses are normal Python classes with some extra features for carrying around data and state. If you find yourself writing a class that is mostly attributes it's a dataclass.

Dataclasses have some other nifty features out of the box such as default double underscore methods, type hinting, and more.

For more information checkout the docs.

Dataclasses as configuration objects

Recently I’ve had the opportunity to work on a couple of Python 3.7 projects. In each of them I was interacting with many databases and API Endpoints. Towards the beginning of one of the projects I did something like this:

elasticconfig = {"user": os.environ["ESUSER"],  
 "endpoint": os.environ["ESENDPOINT"],  
 ...  
 }When I checked in the code I had been working on one of the reviewers commented that this pattern was normal, but since we were using 3.7 lets use a dataclass.

import os  
from dataclasses import dataclass@dataclass  
class ElasticConfiguration:  
 user: str = os.environ["ESUSER"]  
 endpoint: str = os.environ["ESENDPOINT"]  

...Makes sense, but what’s the practical benefit? Before I wasn’t defining a class and carrying around the class model that I’m not really using.

  1. Class attribute autocomplete. I can’t tell you how many times I used to check if I had the right , casing, abbreviation etc for the key I was calling. Now it's a class attribute, no more guessing.
  2. Hook up mypy and find some interesting errors.
  3. Above you’ll notice I used os.environ[]. A lot of people like to use an alternative .get()pattern with dictionaries. The problem is often times a default of None gets supplied and you're dealing with Optional[T], but still acting like it's str everywhere in your code.
  4. postinit
  5. Dataclasses have an interesting method called postinit that gets called by init. On configuration objects this is a handy place to put any validation function/method calls you might build around attributes.
  6. Subjectively elastic.user is faster to type, and more appealing to the eyes than elastic["user"]. So the next time you find yourself passing around configuration information remember dataclasses may be a useful and productive alternative to passing around a dictionary.

Additional Resources

Beyond the docs here are some links I found useful when learning about Python dataclasses.

What is ODBC Part 3 of 3

For more information see part one and part two

Setting Up

Just like any other piece of software we can make use of debuggers to step through our application code and see what is happening with ODBC. To do this with Python you should be running a version with debug symbols included. You can do this via:

git clone git@github.com:python/cpython.git  
mkdir debug  
cd debug  
../configure --with-pydebug  
make  
make testAdditionally you will want to clone pyodbc so that we can make use of symbols.

git clone git@github.com:mkleehammer/pyodbc.git  
CFLAGS='-Wall -O0 -g' python setup.py build

Finally you’ll need some code and a database to interact with. If you want I have an example repo which uses docker to start Postgres and/or MSSQL. It also contains some python example code and pyodbc in the repo for debugging.

One final note, if you wish to explore code all the way into the driver manager and/or driver you will need a debug version of each. For Mac and Linux you can do this with unixodbc found here or here and specify debug with make similar to CPython above. For a debug driver build checkout Postgres psqlodbc.

Stepping through

I’m writing this on OSX, but the concepts are the same regardless of platform. On OSX you can use LLDB or GDB (I used LLDB as a learning exercise), on Linux GDB is probably your go to and on Windows you can use WinGDB or the debugger built into Visual Studio for C/C++.

From the command line start your debugger, or if using GDB/LLDB call your tool with the -f flag specifying you want to load a file and call Python with your debugger so the Python interpreter will run the file inside your debugger.

lldb -f python -- -m pdb main.py

From here you can execute the application, use normal step, thread and frame functions to inspect the stack at different steps or get additional dump file information. Some breakpoints I found interesting can be set with:

breakpoint set --file connection.cpp --line 232  
breakpoint set --file connection.cpp --line 52  
breakpoint set --file cursor.cpp --line 1100  
breakpoint set --file getdata.cpp --line 776runIn case it is helpful you can find an lldb to gdb map [here](https://lldb.llvm.org/use/map.html).

Contact

If you have experience with ODBC internals, want to correct something I’ve written or just want to reach out feel free to follow up via email or on .

I also have a repo with the material I used for a presentation on this at the Louisville DerbyPy meetup in March of 2019.

What is ODBC Part 2 of 3

In the first article I mentioned that ODBC (Open Database Connectivity) is a specification for a database API creating a standard way for applications to interact with various databases via a series of translation and application layers. To create this standard abstraction ODBC has two components, the driver and the driver manager.

ODBC Driver

Within ODBC the driver encapsulates the functionality needed to map various functions to underlying system calls. This functionality spans calls to connect, query, disconnect and more depending on what the target data source provides. While almost all drivers provide the prior basic interactivity others many expose more advanced functionality like concurrent cursors, query translation, encryption and more. It’s worth reviewing your ODBC driver docs to see what features you might use specific to your data source. While ODBC provides a useful abstraction for connecting to data sources it’s worth using whatever additional functionality is available to make your application perform it’s best and keep your data secure on the wire.

ODBC Driver Manager

Ok so the ODBC driver encapsulates the functionality for interacting with our data source what do we need a driver manager for? First it’s not uncommon that you may want your application to interact with various different data sources of the same type. When this happens the driver manager provides the management and concept of the DSN. The DSN (data source name) contains the information required to connect to the data source (host, port, user etc for more information checkout connection strings since the driver manager can save these to a name you specify. This way you can have one driver (for instance Postgres or Elasticsearch) that can be used to connect to various different data sources from the same vendor. In addition to this the driver manager is responsible for keeping up with what drivers are available on the system and exposing that information to applications. By knowing what drivers and DSNs are available the driver manager can sit in between your application and the ODBC driver making sure the connection information and data passed back and forth is mapped to the right system and that return calls from the driver get mapped back for use by applications.

Next Up

Last up in post 3 I plan on exploring ODBC from the application layer to the driver layer with Python and pyodbc looking to trace internals and see exactly how and where different layers connect.

Contact

If you have experience with ODBC internals, want to correct something I’ve written or just want to reach out feel free to follow up via email or on .

I also have a repo with the material I used for a presentation on this at the Louisville DerbyPy meetup in March of 2019.

What is ODBC Part 1 of 3

At my last job we used pyodbc to manage database interactions in a few different projects. We did this because we interacted with 5 different relational databases, and not all of them had native driver libraries for Python. In addition to this our use of pyodbc meant that we had a nice consistent database API for on-boarding, or when somebody needed to interact with a database that might be new to them for their project. Recently though I had somebody ask me what ODBC was, and to be honest I didn’t have a good answer. I’ve used ODBC libraries in multiple languages, but I hadn’t really dug into the nuts and bolts of what it was because I hadn’t needed to. I knew enough to use it, it worked well and there were bigger problems to solve. It’s a good question though. What is ODBC?

At a high level ODBC (Open Database Connectivity) is a specification for a database API creating a standard way for applications to interact with various databases via a series of translation and application layers. It is independent of any specific database, language or operating system. The specification lays out a series of functions that expose database functionality across systems. It’s an interesting, and I would say fairly successful abstraction since many programmers know how to connect, query and process data (via ODBC) in their language, but maybe they have never read sql.h or the SQLBrowseConnect function. For the full API Reference check here.

API vs Protocol

Quick side note. You may have heard about wire protocols and databases. ODBC is not a protocol; it is an API. This is important because databases tend to define their own wire protocols (some share this now with things like the Postgres wire protocol being OSS) that dictate the sequence in which events or bytes must happen for communication to work. ODBC as an API doesn’t dictate this kind of detail, instead it describes how to expose the database functionality to the programmer consistently independent of the database.

API: describes all valid functionality and interactions Protocol: defines the sequence of operations and bytes.

Why ODBC

If databases define their own protocols and have their own way of communicating why should we worry about ODBC? Turns out there are a lot of databases you can use. Factor in an explosion of languages and operating systems and suddenly you have as many developers writing low level wrappers for database drivers as you do building your actual product. Instead ODBC provides a standard for database developers to expose functionality without developers having to reinvent new bindings for each new language, database, operating system combination. You can read more here

Next Up

Now that we know ODBC is an API I want to look at the architecture of ODBC. In my next post I will cover the driver manager, ODBC drivers and the ODBC API. After that I plan on exploring ODBC from the application layer through the driver layer with Python and pyodbc looking to trace internals and see exactly how and where different layers connect.

Contact

If you have experience with ODBC internals, want to correct something I’ve written or just want to reach out feel free to follow up via email or on .

I also have a repo with the material I used for a presentation on this at the Louisville DerbyPy meetup in March of 2019.

Subdomain SSL with Gitlab Pages

This is out of date, I have since switched to self hosting gitea and AWS.

A few months ago I decided to migrate my Pelican site from Github to Gitlab. This was motivated largely by that fact that Gitlab has CI/CD built in by default. During this migration I also decided it was time to setup my own SSL certificate for burningdaylight.io. Since this was new I looked around to see if there was any documentation readily available , and I found this wonderful tutorial from Fedora Magazine.

Between that and the Gitlab custom domain and ssl I was able to get up and running pretty quickly. I had accomplished my goals:

  • migrate to Gitlab
  • setup CI/CD of the Pelican site project
  • setup ssl

Good to go, done in an afternoon with plenty of time to work on a new post. I thought.

About a week later I was on a different computer and instead of browsing to https://burningdaylight.io I went to https://www.burningdaylight.io and Firefox blocked my request citing an SSL certificate error. Wondering what I had done wrong I started tracing back through what I had done and realized that I had only setup SSL certificate for my primary domain. Luckily last year lets encrypt added support for wildcard certificates to certbot. Unfortunately that has not been included in a release so there’s a couple steps that differ from the original Fedora article above.

Setup Instructions

Below are the steps to use certbot, gitlab pages and your domain management console to setup SSL for your subdomains. This assumes you are using a Debian based OS (I’m using Ubuntu 18.04) to install Certbot. If not swap out the certbot install steps for your OS and continue.

If you read the Fedora article linked above you do not need another key in .well-known. Instead for your subdomain you will validate with certbot by a DNS record setup via your Domain Management Console.

sudo aptget install certbotcertbot certonly -a manual -d *.<yourdomainhere>.<topleveldomainhere> \  
--config-dir ~/letsencrypt/config --work-dir ~/letsencrypt/work \  
--logs-dir ~/letsencrypt/logs \  
--server <https://acme-v02.api.letsencrypt.org/directory>Follow the instructions entering your email, reviewing ToS, etc

You will then see this prompt:

Please deploy a DNS TXT record under the name  
acme-challenge.burningdaylight.io with the following value:

Login to your domain management console and setup a txt record similar to:

NAMETYPETTLVALUEacme-challengeTXT1800your code from the terminal prompt above

Once you have this setup it’s a good idea to wait a couple minutes since this record will populate via DNS and then return to your console and hit enter.

Once certbot validates the TXT record is available as part of your domain it will provide you the new location of your fullchain.pem and privkey.pem files for use with Gitlab pages.

With these files ready to go browse to your Gitlab page settings and setup your subdomains as documented here and here.

I highly recommend reading the Gitlab documentation above, but to summarize:

  • In your Gitlab pages project settings click add a new site
  • Enter the url
  • Add the data from your fullchain.pem and privkey.pem files generated via certbot
  • Copy the gitlab-pages-verfication-code= section from the Gitlab validation record box
  • Login to your domain management console
  • Setup a new TXT record for your subdomain: NAMETYPETTLVALUEWWWTXT1800gitlab-pages-verification-code=
  • Setup a new A record for

Gitlab

NAMETYPETTLVALUEWWWA180035.185.44.232
  • Return to your Gitlab Pages settings console and click the verify button.

Wrapping Up

With that you pages should show green and verified. If you browse to the different subdomains you setup then you should get through without any SSL problems.

One thing to note is that you will need to renew your certbot certificate every 90 days. This is done via the certbot renew command. I've setup an Airflow dag to take care of this since I have Airflow managing various other things for me. You can see that here

Hopefully you find the above helpful. If you run into issues I recommend:

  • Make sure you used the * wildcard in the domain cert setup
  • Setup your acme-challenge record correctly in your domain management console and left it there
  • Setup the right TXT and A records for Gitlab

Vim and Rust in 2019

I’ve been using Vim as my primary editor for a few months now. Recently I wanted to revisit some project work in Rust, but I hadn’t setup any tooling in Vim for rust yet. The first couple of hits I got on Google were great resources that I’ll provide links to, but they were also over a year old, so while using them as a starting point I’m documenting my setup since some things have changed from 2017.

Tooling

Core Installs:

  • Rust with rustup
  • Racer Autocomplete:

  • YouCompleteMe Language Server Protocol

  • vim-lsp

  • RLS — Rust Language Server So far this has been a fairly pain free experience. As I use this (and vim) more I will likely add some updates related to packaging, compiling and debugging in Vim, but for now these are the tools that got me started. One thing to note is that I recommend installing in the order above and following the install directions (especially for the lsp) since those appear to have made some QoL changes in the last year.

Source Articles: https://kadekillary.work/post/rust-ide/ https://ddrscott.github.io/blog/2018/getting-rusty-with-vim/

Building Vim with Anaconda Python Support

This morning I was setting up a RHEL 7 box for development using my normal dot files, but when I was ready to sit down and start working on my project I noticed I got an error from You Complete Me letting me know that the version of vim that was installed wasn't compatible. After checking EPEL for a more up to date install I decided to try pulling vim from source and building it myself.

Luckily this wasn’t too hard, but I did run into a small issue related to the vim .config --with-python* flags since I'm using conda as my Python environment manager. The short story is the vim needs some information from the Python config directory to enable python and python3 support. When you use Anaconda or Minionda to manage your environments these are in slightly different locations than the normal /usr or /lib64 paths you may find in vim build documentation. Instead they will be in your conda environment lib as seen below.

Install additional build dependencies.

sudo yum install cmake gcc-c++ make ncurses-devel

Clone vim source, configure and build. Specifically pay attention to the — with-python* flags and the config directory they use in your conda environment.

git clone https://github.com/vim/vim.gitpushd ~/vim/src./configure --with-features=huge \  
--enable-multibyte \  
--enable-rubyinterp=yes \  
--enable-pythoninterp=yes \  
--with-python-config-dir=/work/alex/miniconda3/envs/py27/lib/python2.7/config \  
--enable-python3interp=yes \  
--with-python3-config-dir=/work/alex/miniconda3/lib/python3.6/config-3.6m-x8664-linux-gnu \  
--enable-perlinterp=yes \  
--enable-luainterp=yes \  
--enable-cscope \  
--prefix=/home/alex/.local/vim | grep -i pythonmake && make installpopdFinally if you use a custom prefix as seen above (prevents system level changes and conflicts impacting others) you probably want to add the below to you .bashrc file.

if [ -d "$HOME/.local/vim/bin/" ] ; then  
 PATH="$HOME/.local/vim/bin/:$PATH"  
fi

And that’s it. You should now have an up to date vim install with Python.